Paper wasps!

We were off on holiday weekend visits for three days but to look at things outside you would think we’ve been gone a week!  It was hot, there were seedling casualties, but most stuff survived and the heat made a couple things explode into growth.

One thing that is growing is the paper wasp nest we found in the little dawn redwood. bald face paper waspI’d rather it wasn’t so close to the sandbox but the kids want it to stay and I’m willing to see how that works out.  The kids are old enough to know better than to antagonize them, but I’m not so sure how that will hold up when the boys get together and hit an “I’m bored” moment….. Obviously I wouldn’t be doing this if there were any known sting allergies around.

The nest is only about four feet up, and I’m curious as to how these guys chose their nest site.  Out of all the bushes and trees around the yard they pick this one.  The one closest to the play area.  Go figure.  But it is interesting to watch them working on the nest, doing what paper wasps do.bald face paper wasp

This can easily turn out to be one of those “that was stupid” posts…. time will tell.  Hopefully in the fall when this set of wasps die and they abandon the nest (they only use it one year) the next generation will pick a better spot.   In the meantime I hope they help themselves to as many caterpillars, bugs and spiders as they want, they can be a great beneficial insect, and I hope they’ll keep my kindness in mind when I absentmindedly bump the nest while mowing back there…. that should be funny to watch.

Life on the Prairie

I’m still working on the street border cleanup and expansion.  Normally I would have called it quits as far as digging and transplanting go but with all the rain and overcast days I’m just trying to get  a little more done before the lazy days of summer kick in.  Today the humidity almost killed me but I did manage to push myself and got a little further.  An update is on its way but in the meantime here are a few pictures of another part of the yard.

The far reaches of the yard are left to themselves for most of the year.  I love the wild look but that opinion is not held by everyone who lives here or who peers over the fence.  It will get a rough mowing around the end of July but for now it’s full of wildflowers and bugs and butterflies and bunnies.  I was so pleased with myself for getting all the paths mown I figured I’d take a couple pictures.meadow garden

This is the area behind my mother in Law’s house.  It’s a no-man’s land between her fence and the new fence surrounding the new industrial park.  About five years ago this was just bare earth but over the years I’ve seeded in some grass, thrown down some daisy and rudbeckia seed and just kept it mowed (early spring and mid summer) to keep the worst of the weeds from taking over.  Here’s the five year picture.  In the front you can see where I spread the lawn clippings I collected from another part of lawn that had gone to seed. meadow garden

meadow gardenThe worst weeds back there are creeping blackberries, Canada goldenrod, and queen anne’s lace.  I think I pulled most of the QA Lace (too invasive) but the blackberries are giving me trouble.  The kids call them “pokies” and I hate the way the runners grab your leg and razor wire a cut right in the sensitive part of your ankle.  I hate them and remember hating them myself as a kid when one got me out in the woods.

meadow gardenThe wild black eyed susans are blooming now as well as some late oxeye daisies.  Both of these are welcome and I’ve been trying to add some other interesting stuff to keep them company.  The late summer mowing should encourage the early blooming grass to fill in, but I’ve been planting out some butterfly weed seedlings (Asclepsias tuberosa).  The first to reach blooming size is flowering this year, I hope others follow.meadow garden

The chainlink fence went up last year and has cut me off from half the meadow.  There’s a possibility a gate will magically appear in the fence and I’ll again be able to give this a mow.  I’d like to be able to control what grows in back here and don’t want trees too big and too close to the fence.

Back on our side of the fence there’s a second half of the meadow called the ‘orchard’.  I planted an apple tree there this spring, hence the lofty renaming.  The grass in this section is thicker since part was already turfgrass before I started letting in all the daisies.meadow garden

With the paths mowed and the edges neat I think the meadow has a nice look.  It’s popular with the younger crowd for important activities such as daisy collecting and grasshopper catching.  It’s also a great place for firefly chasing, and since July is firefly season there was a lot of path running as the kids tried to catch as many as they could.meadow garden

I’ll end with a look across from the vegetable garden to the meadow…. I mean orchard…… If you look carefully through the crooked tomato trellis you might catch a glimpse of ‘the queen of the prairie’.  She guards the entrance to the orchard and admires the overgrown lawn.  Some say she’s just an old plaster statue that wouldn’t sell at an estate sale.  I say she’s our queen.meadow garden

meadow gardenNow back to digging says the queen.

Annabelle

It was a dry spring, but based on the weather pattern we’re in now it won’t be a dry summer.  That’s fine with me since I hate watering, but others with different summer plans will disagree.  I took advantage of a break in the rain today and finally cut the grass.  Pretty much everything is lush and thick due to the extra water and the hydrangeas are no exception.

I grow “Annabelle” in a couple places around the yard but here at the edge of the orchard is the plant that seems happiest.hydragea annabelle

I think this plant came from a small shoot I felt bad for and stuck into the ground while planting daffodils.  It does well amongst the weeds and always puts on a great show with these volleyball sized bloom clusters.  “Annabelle” is one of the arborescens type hydrangeas.  Hydrangea arborescens is the species and it’s a different species than the less hardy florist hydrangeas (the blue/pink or purple ones), oakleaf hydrangeas, and the late summer h. paniculata (the big white or pinkish late summer bloomers).  They’re native around here and are commonly found along creeks and streams, just in a little more modest bloom form.  hydragea annabelle“Invincibelle spirit” (pink) and “incrediball” are also arborescens types that have recently come out, but the first has a pink color that I’m not crazy over and the second just hasn’t found its way into my garden yet (it’s supposed to be less floppy).  Arborescens hydrangeas are easy and reliable bloomers.  I cut mine back completely in the spring and that’s about all I do and still get a great show.  Water is about the only thing they might ask for.  Mine are in full sun and in years of less regular rain the plants wilt, die back, and the blooms get crispy edges due to my neglect.

“Annabelle” has been around for a while.  She was found back in 1910 in the wilds outside of Anna Illinois by Harriet Kirkpatrick, and it was her and her sister Amy that brought the original plant into their garden.  After decades of passing along from gardener to gardener “Annabelle” hit the big time in 1962 when she was introduced to the nursery trade.  She’s still a great garden plant.  This is a larger clump that slowly spreads a bit each year via short runners.  If I had a big yard with a little shade I think I’d have to spread these out to fill in a huge swath of white.hydragea annabelle

Garden Dolphin

Ok, so it’s kind of a dumb title but the name delphinium derives from the latin word for dolphin.  Something about the inner parts of a delphinium flower reminded someone somewhere of the shape of a dolphin.  Good enough for me, but last night’s deluge drowned all my little dolphins.  The rain was too much and nearly every single bloom is bent over or snapped off.  Fortunately I can remember them through last weeks pictures.

This is the sole survivor of a packet of “New Millenium” seed.  They sprouted well but a week of neglect in July left only this one.  Several more weeks of neglect stunted the seedling but then for some reason a late fall planting in garden soil and a winter rest inspired it to send up a bloom stalk.  My vote is nay on the fuzzy brown/black center but others are in favor.

perennial delphinium I’m much in favor of the dark center of this violet(?) bloom….. (sorry but my color vocabulary doesn’t go much further than blue and purple).  Note the permanent crook in the stem that comes from waiting too long on staking.perennial delphinium

This is another which was inspired to bloom well this summer.  It’s possible the cool weather has had a lot to do with this.perennial delphinium

These blooms are nothing compared to the flower show this plant is capable of.  Growing delphiniums is a borderline activity anywhere temperatures routinely go into the hot and humid range, and if you’re the type of person who enjoys spending the summer poolside or shaded under the porch (or hidden away under central air) well then you’ve probably got the beautiful summers that delphinium hate.

This amazing plant was obviously not the product of my upbringing.  Purchased this April for maybe $4 it’s worth every cent.  Unfortunately I can’t find any good pictures from when it was opened, just this starting view.  If you’re selecting a delphinium in the spring, look for one with a strong single stem, not multiple growing points.  One with a flower stalk showing if possible.perennial delphinium

One day I might give these plants what they really need.  In my zone (6-ish) that means morning sun, rich soil with no root competition, regular watering, and any soil amendment you can spare.  They are heavy feeders and if you noticed the yellowish leaves on my plants you’ll know I don’t fertilize them like I should.  Maybe somewhere deep down inside I know delphinium season always ends badly, and this year is no exception.  Summer storms and snapped stems let me cut what I never would have thought of cutting and bringing indoors.  The kids have something nice to look at today while they eat their breakfast.perennial delphinium


Vegetable update

I have a few hours this morning and rather than get some real work done I wanted to give a quick vegetable garden update.  We’ve been picking lettuce from the deck planters and now also out of the fenced garden area.  This “Matina Sweet” butterhead is tasty and if you look closer to the fence you’ll see the first two “Packman” broccoli are ready…. even though I’m not exactly sure how to tell when broccoli is fit for harvesting.spring vegetables

Last year’s broccoli went towards raising a healthy, vitamin rich, wild bunny population, this year the fence has really made a difference.  Too bad it doesn’t keep out my newest pest- slugs.

Here’s a slug chewed kohlrabi.  I hate peeling anything off these super fresh home grown veggies, but this one will need it.spring vegetables

The “Bright Lights” swiss chard looks good enough to eat.  I cheated and prestarted in pots, that way when planting out the colors could be arranged 🙂spring vegetables

I just like the looks of red cabbage.  Better soil would have done this plant good but it’s not bad considering the only fertilizer for this bed was the bag of chopped maple leaves dug in during spring planting.  I did break down yesterday and gave everything a dose of miracle grow, we’ll see what that does.spring vegetables

Onions look good, I just hope they make it in spite of my late planting.  They still have a way to go….. if worst comes to worst I guess we can try passing them off as tiny gourmet pearl onions or something.spring vegetables

“Lancelot” leek.  We’ll see if anyone eats these, they’re new this year, but at least they have all year to get to a good size…. unlike the bulbing onions which will die back and bulb up once the days get short enough.

spring vegetables

The zucchini seeds are up and growing fast now that summer temperatures are here.  If I had more room it wouldn’t be a bad idea to put in a couple new seeds for a late summer crop…. just in case the vine borers kill off this batch.spring vegetables

spring vegetablesPole beans, bush beans, corn, peppers…. all are starting to come along but for some reason the eggplants are a bit sluggish this year.  Just a few inches tall and they’ve got to deal with flea beetles and the little holes they make, plus some random bug (unfriendly I’m sure) leaving a batch of orange eggs….. possibly potato beetles….

spring vegetablesEnough vegetables, it’s about time some flowers got in here and there are plenty coming along for July.  Next post should have a couple blooms, until then all I have are tomato flowers.  Not the most impressive but they make for promising green tomatoes.

Canna Virus

The bed expansion is coming along….. not as fast as it should but it’s progressing.  The plan is to go all along the front street border, widen the bed, thin a couple things out, weed, replant, and then mulch.  Each year I like to clear out a couple spots for cannas and other annuals, and since it’s almost July I better get a move on it before it’s too late.

Cannas are usually easy to grow, but in the past decade canna virus has become a serious problem due to the appearance of yellow streak virus.  CaYSV is the fancy name and it does exactly what it sounds like it does.  On a normally healthy green leaf it produces streaks of yellow.  Here’s a canna I was looking forward to adding to the garden, instead it will end up in the trash due to virus.canna virus

I got the canna in a trade and it was supposed to be a nice healthy banana canna and reach up to 12 feet tall… but it’s not to be.  I’ll get over it, but it seems like the plant you can’t have is the one you want most.

The yellow streak virus weakens the leaves and results in brown dead streaks.  Most of the cannas I see for sale have the virus, and Tropicana is one of the worst with green streaks showing up instead of yellow.  It’s a shame but hopefully with tissue culture and more effort in raising healthy plants we can get some healthy cannas back.


Manifest Destiny

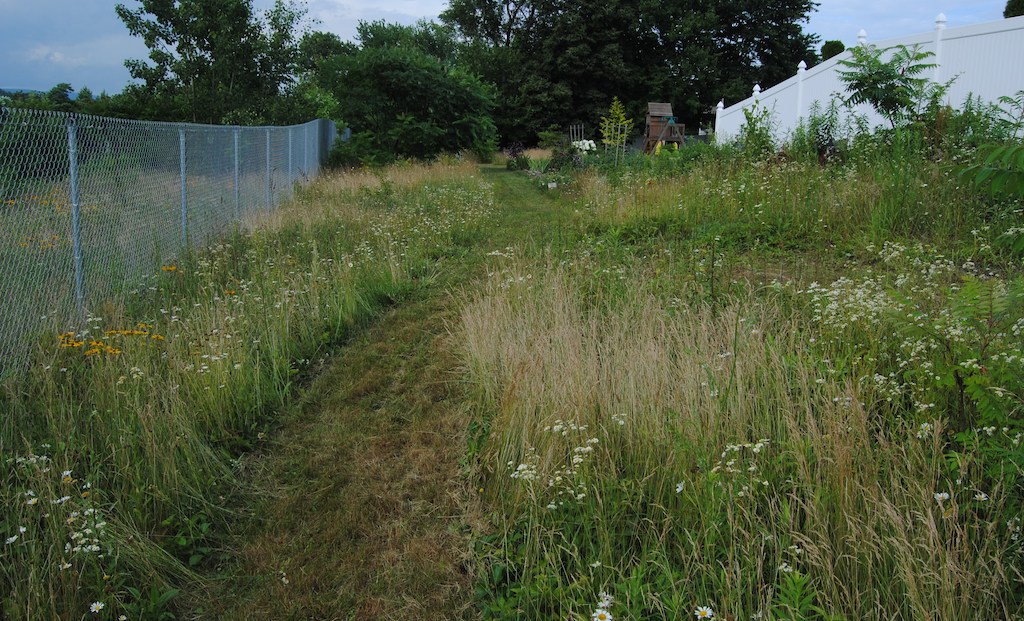
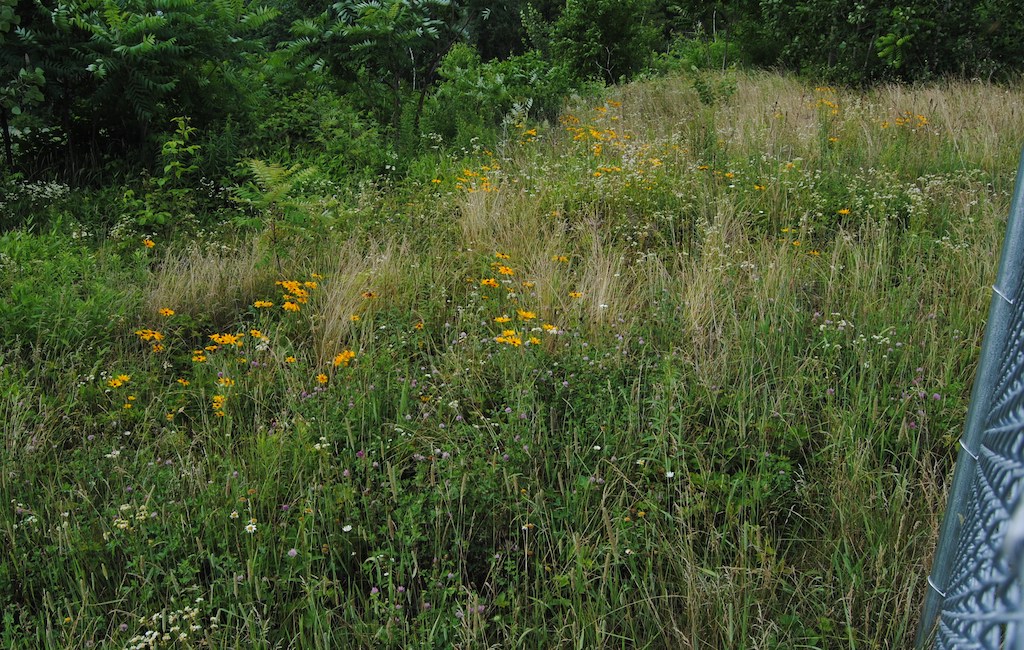
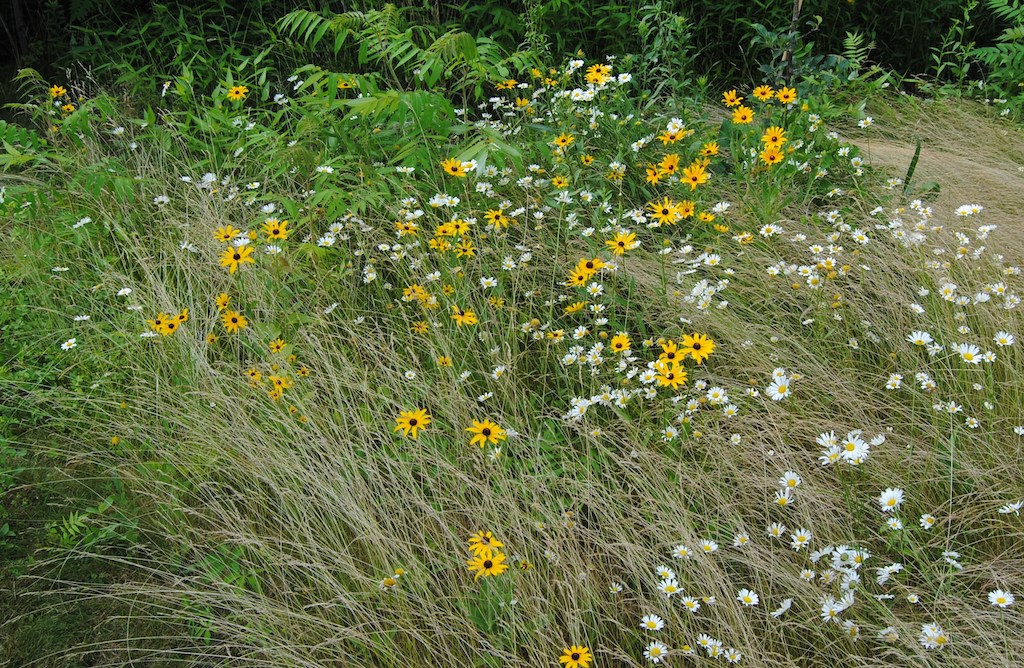
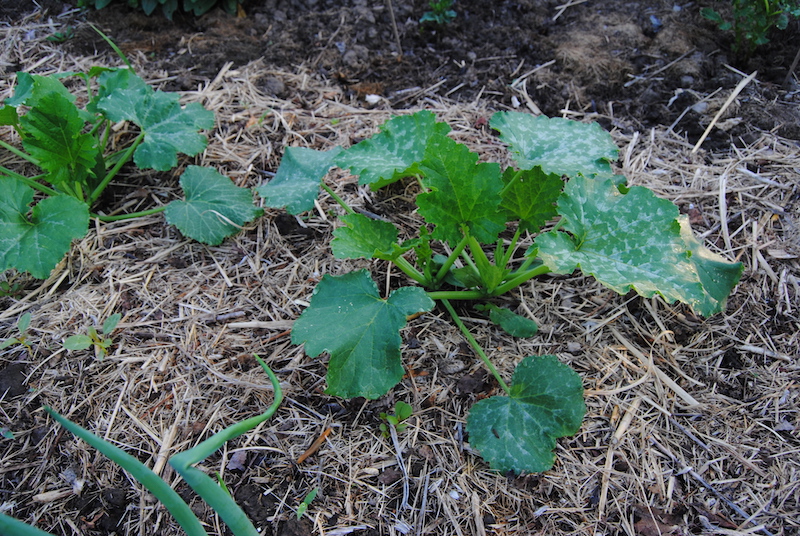
The flower beds are expanding again at the expense of turf area and that’s fine with me since I hate mowing the lawn, but the lawn clippings are my number one choice for mulch in the garden.  Less grass growing means less mulch is growing.  An inch or less of lawn clippings tucked in around perennials and vegetables is a great mulch, it doesn’t mat much, kills weed seedlings, and most importantly moves all that free nitrogen fertilizer from the lawn into the more useful garden.  Earthworms love grass clippings and happy earthworms mean happy plants.

So that’s my dilemma.  More room for plants or more mulch growing fields…. obviously plant room wins every time.  I guess my flower beds are like little European settlers ripping up the prairie and spreading across the land and the lawn grubs are tiny tiny bison losing habitat and being pushed to the edge…… ok too much coffee.  I don’t think this has anything to do with history repeating itself.

So.  Easiest way to expand beds: have someone else do it.

Second easiest: lasagna gardening or no dig gardening.  There are books, FAQ’s, youtube videos, but it’s a simple concept.  Basically all you do is lay down paper, newspaper or cardboard to smother whatever is there and then cover this with leaves, compost, topsoil or whatever else can hold the paper down and eventually become a part of the soil.  It takes some time (about a year to rot down) and can be messy, so what I do for larger beds is plant what I want right into the lawn, throw a little compost around them for the worms, cover grass in between with newspaper (leave the paper out in the rain for a couple weeks to wet- it’s much easier to work with) and then hide everything under a nice layer of wood mulch.  Much more suburban-friendly:)

Third easiest: Buy topsoil, dump topsoil 4 or more inches deep (with or without paper underneath, depending on what weeds are there), plant into topsoil, mulch, call it a raised bed.

Fourth: My prefered method, turn under everything and just plant away (more to follow)

Fifth:  (notice I’m leaving out the word ‘easiest’ from now on) Dig up turf…… throw down compost, fertilizer, lime, whatever goodness you want to mix in….. dig or rototill it all together… plant with pride.  You lose all the fertility and organic matter of the top few inches (the best part) but the soil prep makes up for it.

Sixth:  Double dig.  Hardcore stuff here.  Dig a one-shovel depth trench across the bed and put that soil into a wheelbarrow or on the side.  Get down into the trench and use a pitchfork to loosen the next shovel layer down.  Add soil amendments if you’re that crazy and mix them in too.  Get out of the trench and move over a couple feet.  Dig a new trench, shoveling the soil over into the first trench.  Repeat all the way across the bed.  When you’re done, drag the soil you put aside down to the last trench and fill it up.  Then to completely kill your back, redig the top layer across the entire bed adding whatever amendments you want.  It’s a great concept which I tried a couple times back in my teen years, but teenagers are not well-known for good judgement and/or good time management.  Plus I’m much lazier now.

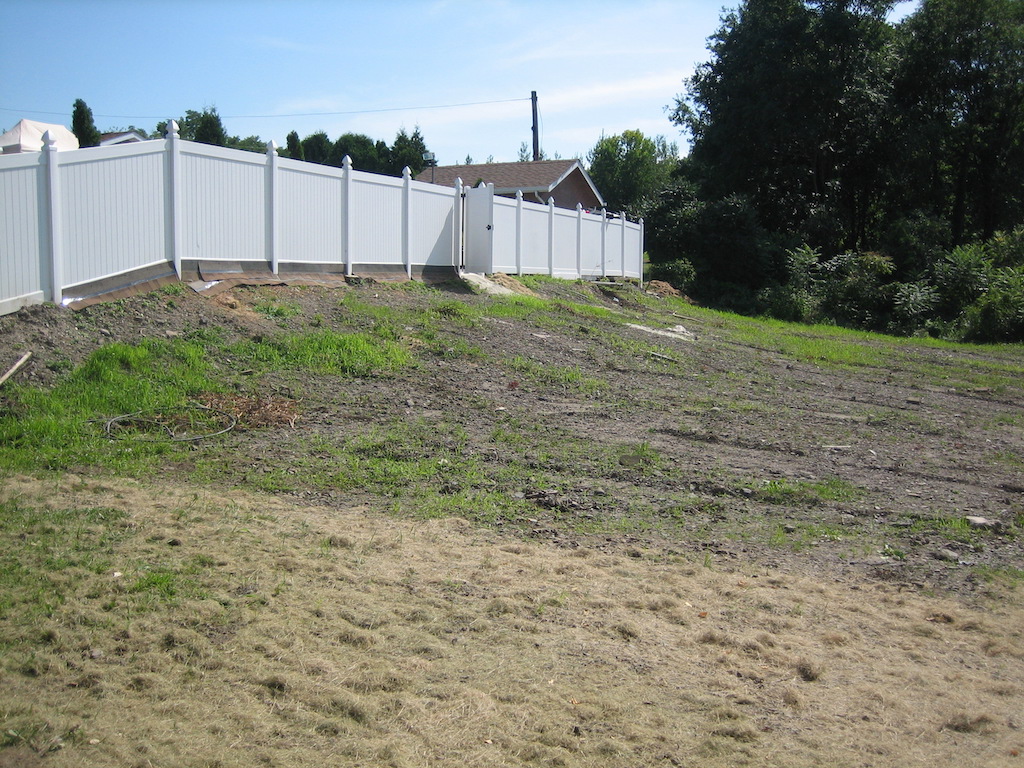
Ok this is going on for way too long.  All I wanted to do was put up a couple pictures of my expanded flower bed and I guess since the kids are sleeping late I feel like I could go on all morning!….. wait here they come….. time to wrap things up.

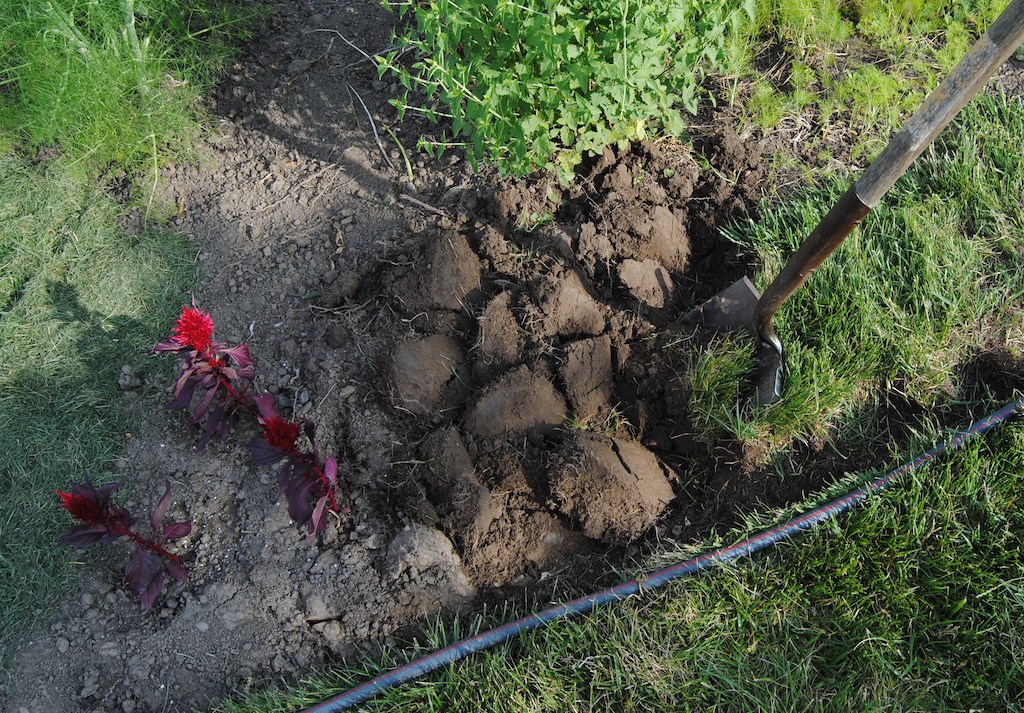
My choice for new bed prep:  Line out your new bed with a garden hose to get the shape the way you want.  Remember less is more as far as curves go, so avoid a sharper turn than your mower can handle.  A sharp turn means you’ll always be missing that spot or mowing into the bed to get it.

Edge along the hose with a square spade.  Use a round tip shovel to pop out a little of the grass along the outside of the bed and establish your edge.

digging garden beds

Start digging.  Use the round tip shovel to slice off a shovelful of grass and soil.  Flip the dirt back into the hole grass side down and keep going.  It helps if you remove a couple shovelfulls first in order to have a spot to flip the grass over into.digging garden beds

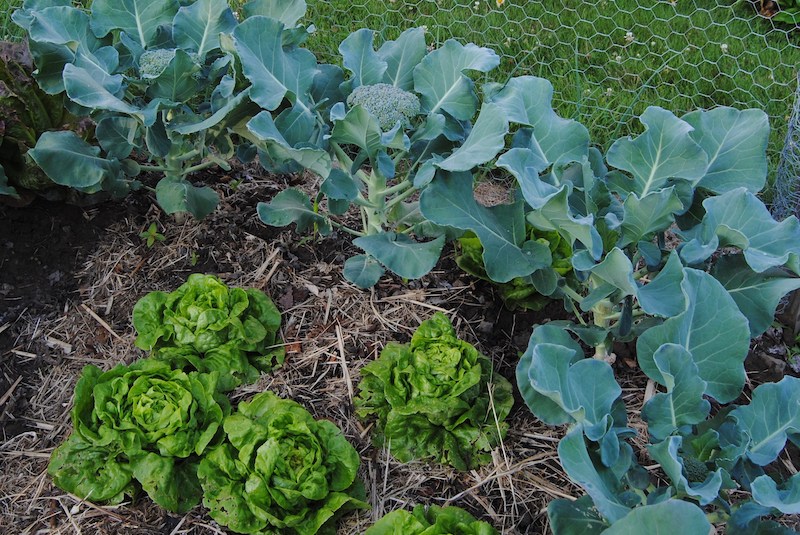
I plant immediately after turning, the section to the left was yesterday’s section.  Over the next couple weeks the grass rots into compost and the plants love it.  As always mulch!

Two last tips.  Beware southerners, your grass isn’t as wimpy as mine and you’ll need extra smothering or even roundup….. also digging it over like this won’t barely phase it if it’s something like Bermuda grass.

Also ALWAYS sharpen your shovels and hoes.  Use a metal file or better yet a grinding wheel to put a nice sharp edge on the blade.  They don’t come from the store sharpened (for obvious reasons) and if you’ve never done this before you will LOVE how a sharp shovel or hoe cuts through the dirt and weeds.
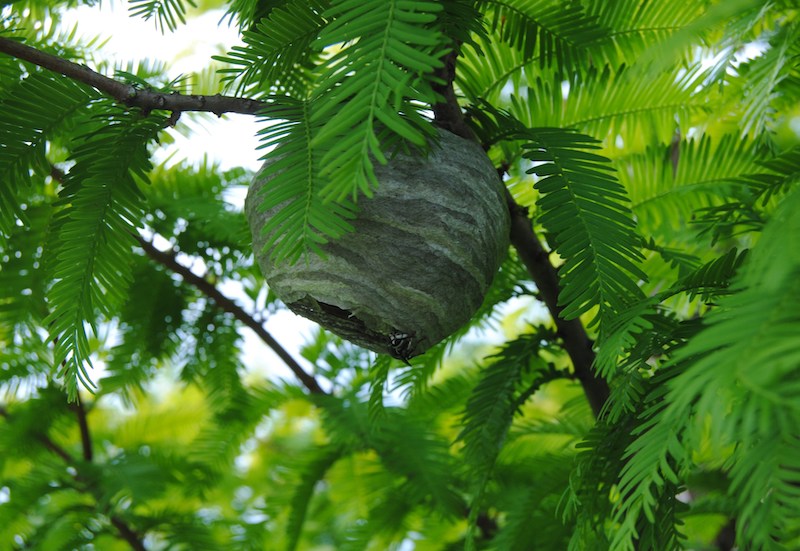


Mid June Color

I’ve been feeling a little insecure about the garden.  It looks ok in spots, but there’s just not much that I consider worth posting.  I’m trying, and I think I’m making a little headway in weeding and planting, but it’s still a mess.  Apparently that leaves me with two choices, either put off posting or post the ugly.  I’m going with the second.  Maybe if I had more skills I could do a couple flower closeups, but my photography just isn’t there so as a result you’re left with weedy, unmulched, undeadheaded garden scenes….. Enjoy!

Here’s “William Baffin” (I believe), a climbing rose that hasn’t yet begun to climb.  It has started suckering though, and I was surprised and pleased to see the suckers blooming as well, and in the same color!  The variegated grass in back is Arundo Donax “variegata”, an awesome bold grass that should reach at least 10 feet by frost.  Because of the size it’s not for everyone and before you get too attached I want you to know it doesn’t keep this color all season.  It tends to “green-out” once heat and drought kick in.rose william baffin

“Blue Hill” salvia.  Nothing fancy about this one.  I call it a parking lot plant since it shows up all over the place, but my snobbery hasn’t pulled it out yet.  Looks like my snobbery also has yet to pull out the horseweed and old iris stalks that frame this picture.  (but give me credit for cropping out the dead dogwood which is right next to this)salvia blue hill

Another parking lot plant, I think it might be a “red carpet” rose, blooming away.  I tried not to show too much of the suffering yucca transplant growing to the front but couldn’t get it all out.  This is an old planting in the newly expanded front bed and hopefully one day I’ll be confident enough to show it off.  I’m back and forth on the colors here and can’t seem to work out what’s nicest in front of the brick.  So far red, yellows and gray are showing up most but I’m still not sure it’s a good look.rose red carpet

This is where I’m focusing right now.  The bed along the street needs a once over to get rid of old iris stalks, rip out overcrowded perennials, plant a couple annual patches, and hopefully get a layer of mulch….. oh and also widen the bed another foot or two 🙂June perennial border

It’s hard to see in the grainy photo, but there’s about a billion fennel seedlings that need to come up.  They’re nice and airy and I like a couple but enough is enough.


That wasn’t smart 2.0

They (whoever they may be) say you should have a theme to your blog.  I thought it was gardening, but maybe I overestimated myself.  Maybe a better theme would be stupid things I do while in the garden.
This week’s stupid move was breaking the brand new terra cotta pots when I put them down in the garage.  Crack and $15 dollars goes down the drain.  Total enjoyment at home time: 10 minutes.  Luckily only the bottom (most expensive) pot was broken,  I wonder if I could glue it.  I needed the pot for the last of my deck annuals, but it looks like I’ll have to wait till next year.  This was it for the annual pot budget…..cracked terra cotta

My best weed

My garden lacks sophistication.  There’s little if any structure, the planting schemes are weak, it’s usually a mess, and I have plenty of weeds.  To help get around these faults I’ve taken to accepting volunteer help in designing the beds and plantings.  What this means is I avoid a lot of unnecessary work by letting things self sow and keeping most of these volunteer seedlings as “design elements” instead of admitting they’re unplanned weeds.  Oxeye daisies are one of these and they do a great job filling every little gap anywhere they can.  I don’t mind.oxeye daisy

Between the daisies, fennel and verbena bonariensis I could keep this border filled all year without lifting a finger, but even I would have to admit it’s more of a highway wayside look than a garden.  I’ll need to pull most of these this week as I work through the bed thinning overgrowth and then adding a few annuals and tropicals for summer color.

Daisies are even easier in the no-man’s land between the industrial park and our development.  Rather than keeping a tame suburban lawn here I’ve opted for a meadow of rough wildflowers and waving grasses.  The grasses are slowly establishing but the daisies filled in the first year.oxeye daisy

Rather than beating this area into submission every week, I let it go until July or so and then give it a cut to spread seeds and wack back the less-preferred sumac and golden rod.  With a mown path for more civilized access this is a popular area for the kids and their friends.  Many bouquets find their way out of this weed patch and onto our kitchen windowsill, and the grasshoppers and bunnies are just as popular….. unfortunately they also eventually find their way out of the meadow.oxeye daisy

To my surprise this meadow area is not as popular with the grownups.  It’s become a tradition each spring to engage in the ‘cutting of the weeds’ argument and then take the day long vow of silence that follows.  But for now the grass and daisies stay and the wildlife rejoices.